

How to Prevent Channeling in Espresso
Last Updated: November 10, 2026
Quick Summary
To prevent channeling, make every puck the same: weigh your dose, stir with a WDT tool to break up clumps, level the bed, and tamp straight and firm. Repeatability beats perfection, so follow the same workflow shot after shot and change only one variable at a time.
- Channeling is water forcing through weak spots in the puck instead of flowing evenly through the whole bed.
- A healthy shot starts as a slow, even drip across the whole basket, not a single fast stream.
- If shots swing wildly with the same dose and grind, the grinder is the first suspect.
- A crater that appears in the same spot every shot points to a physical defect like a warped basket.
- Log dose, grind, time, yield, taste and puck condition for every shot to spot patterns fast.
Table of Contents
- What Causes Channeling in Espresso
- How to Tell If Espresso Is Channeling
- Espresso Channeling Grind Size and Grind Consistency
- A Repeatable Puck-Preparation Workflow to Prevent Channeling
- Espresso Channeling Fix: A Step-by-Step Diagnostic Decision Tree
- Separating Puck-Preparation Problems from Grinder or Machine Problems
- Controlled Troubleshooting and Shot Logging
- Stocking Your Home Bar with Fairwood Coffee
- Frequently Asked Questions
What Causes Channeling in Espresso
Channeling in espresso is water forcing its way through weak spots in the coffee puck instead of flowing evenly through the whole bed. The result is a split personality in the cup: some grounds get over-extracted and turn bitter, while others stay under-extracted and taste sour. The same pattern shows up in home setups again and again. The fix almost never starts with a new gadget. It starts with understanding why the puck breaks down.
The honest answer is that most channeling begins before the pump ever engages. Water takes the path of least resistance, and a puck with soft pockets, clumps, or a tilted surface hands it a shortcut. A Reddit poster on r/espresso described trying grind-size changes, a puck screen, and different tamping pressure without success.
Uneven Coffee-Bed Density
Density is the root cause most people skip past. If the coffee sits denser on one side of the basket than the other, water rushes through the loose side and barely touches the tight side. You get uneven extraction, and no amount of extra tamp pressure will level out a bed that was already lopsided.
Common density problems include:
- Ground coffee piled to one side before tamping
- Clumps that create hard pockets and soft gaps
- A tamper pressed at an angle, tilting the bed
- Too much headspace letting the puck shift under pressure
Distribution and Clumps
Distribution is how you spread the grounds evenly before tamping. Skip it, and clumps survive into the puck. Those clumps act like small dams, and water routes around them. A distribution tool or a simple WDT tool, which is a set of fine needles used to stir the grounds, breaks up clumps and evens out the bed. It takes seconds and it changes the shot.
How to Tell If Espresso Is Channeling
You can spot channeling without any special equipment. The signs show up in the flow, in the puck after the shot, and in the cup itself.
Visual Signs During and After the Shot
Watch the first few seconds of the pour. A healthy shot starts as a slow, even drip across the whole basket. Channeling looks different:
- Spraying or spurting from one spot
- A single fast stream while the rest of the basket stays dry
- Blond streaks appearing early in the flow
- A hole or crater in the puck after you knock it out
- Wet patches on one side, dry grounds on the other
A bottomless portafilter makes these signs obvious.
Taste and Timing Clues
Your palate is a reliable detector. Channeled shots often taste sharp and sour at the front, then harsh and bitter at the back, because both under- and over-extraction happen in the same cup. Timing tells you more. A shot that races through far faster than usual, or one that stalls and then gushes, points to uneven flow. Track shot time and yield together. If the numbers swing shot to shot with the same dose and grind, channeling is a likely culprit.
Espresso Channeling Grind Size and Grind Consistency
Grind size and grind consistency decide whether the puck resists water evenly. Too coarse, and water finds gaps fast. Too fine, and the puck chokes, then fractures under pressure. Inconsistent grind is the sneaky one: a mix of fine powder and coarse chunks creates uneven puck density no matter how well you distribute.
Start with grind size, then check consistency:
- If shots run fast and taste thin, grind finer in small steps
- If shots stall or turn bitter and muddy, grind coarser
- If results swing wildly with no change, your grinder is likely the problem
A grinder that produces a wide spread of particle sizes will keep undermining you. For practical guidance on choosing one that holds consistency, see our guide to manual coffee grinders for beginners.
A Repeatable Puck-Preparation Workflow to Prevent Channeling
The way to prevent channeling is to make every puck the same. Repeatability beats perfection. Follow this workflow shot after shot:
- Weigh your dose. Use a scale, not a scoop. Same dose every time.
- Distribute before tamping. Stir with a WDT tool to break up clumps.
- Level the bed. Tap once to settle, then check the surface is flat.
- Tamp straight and firm. A level tamp matters more than raw tamp pressure. Press until the puck stops compressing, then stop.
- Check headspace. The puck should sit just below the basket rim, not swimming in space.
- Pull the shot and note the result. Time, yield, and taste, every time.
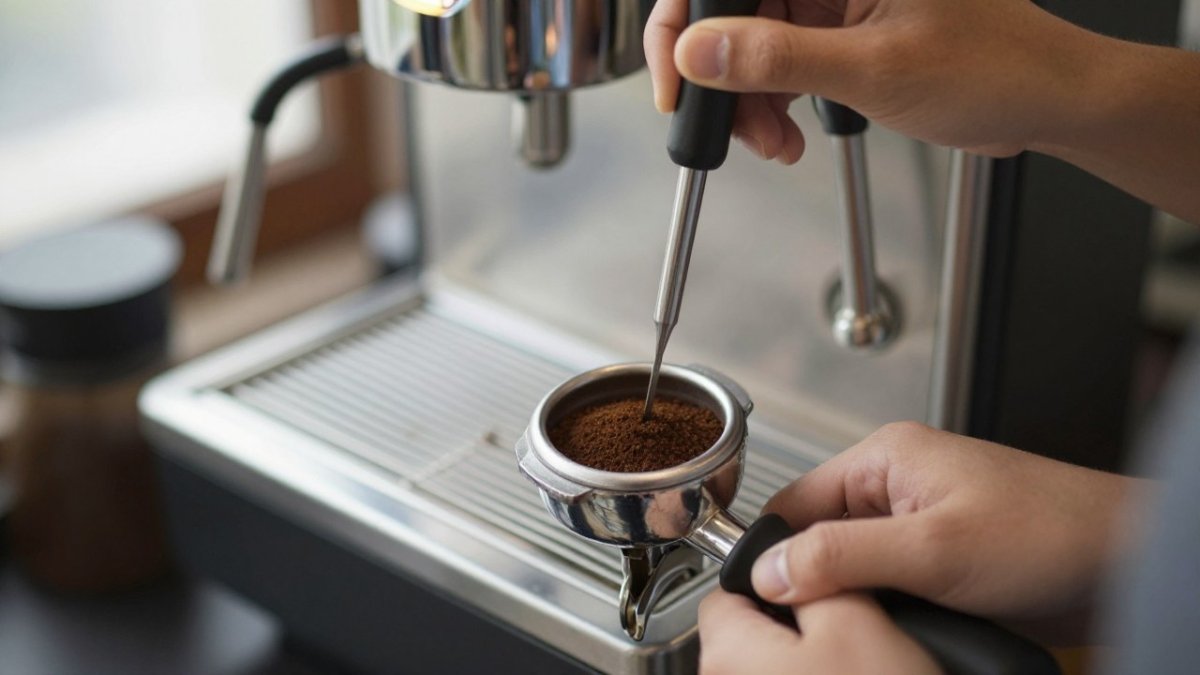
If you want the full extraction sequence that pairs with this routine, our step-by-step guide on how to extract espresso at home walks through it.
Espresso Channeling Fix: A Step-by-Step Diagnostic Decision Tree
When a shot goes wrong, the fastest way to fix it is to stop changing five things at once. Work through this tree in order. Each step asks one question, points to the most likely cause, and gives you a single test to run before moving on. That way you learn what actually changed the shot instead of guessing.
Step 1: What does the flow look like in the first five seconds?
- Even beading across the whole basket, then a slow central stream: the puck is probably fine. Skip to Step 4 and check taste and timing.
- One fast stream while the rest of the basket stays dry: classic channeling. Go to Step 2.
- Spraying or spurting from one spot: a weak point in the puck. Go to Step 2.
- Flow starts even, then a blond gusher breaks through late: the puck fractured under pressure. Go to Step 3.
Step 2: Does the puck have a visible hole, crater, or wet patch after the shot?
Knock the puck out and look at it. A crater, a divot, or a wet patch on one side means the bed was uneven before the pump engaged.
Step 3: Do shots swing shot to shot with the same dose and grind setting?
If the same inputs produce wildly different times, the problem is upstream of your technique.
Step 4: Does the shot taste sour and bitter in the same cup?
That split personality is the taste signature of uneven extraction.
Step 5: Did the problem start suddenly with no change to your routine?
Sudden changes usually point to equipment or ingredients, not technique.
Step 6: Still stuck?
Change one variable at a time and log the result. More on that below.
Watch out: do not run the whole tree on every shot. Pick the branch that matches your symptom, run one test, and pull a shot.
Separating Puck-Preparation Problems from Grinder or Machine Problems
Not every bad shot is your fault. The trick is telling technique problems apart from equipment problems before you spend money on accessories or keep rebuilding pucks that were never the issue.
Use this to sort them:
| Symptom | Likely Source | First Fix |
|---|---|---|
| Spraying from one spot | Puck preparation | Improve distribution and level tamp |
| Shots vary wildly, same inputs | Grinder consistency | Check burrs, grind finer in steps |
| Puck cracks or craters | Tamping or dose | Level tamp, adjust headspace |
| Flow stalls then gushes | Grind or machine pressure | Adjust grind, check pressure |
| Sour and bitter in one cup | Uneven extraction | Rebuild puck, then recheck grind |
| Same crater in the same spot every shot | Basket or screen damage | Inspect basket for warping or burrs |
How to test the grinder before blaming technique. A grinder that produces a wide spread of particle sizes creates uneven puck density no matter how well you distribute.
How to test the basket and machine. A warped basket, a damaged screen, or a machine that is not reaching pressure can mimic channeling. Look for a crater that appears in the same spot every shot, which points to a physical defect rather than technique.
Watch out: do not replace accessories to fix a grinder problem. A new WDT tool will not narrow a particle spread that the grinder is creating, and a puck screen will not fix a warped basket. Test the equipment first, then change technique.
If preparation fixes do not hold, widen the net. Our guide on 7 ways to improve coffee extraction at home covers techniques beyond the puck itself.
Controlled Troubleshooting and Shot Logging
Change one variable at a time, and write down what happened. That single habit separates people who fix channeling from people who keep guessing. Log dose, grind setting, tamp, shot time, yield, and taste for every shot. After a handful of pulls, patterns appear fast.
Keep it simple with a notebook or a notes app:
- Dose: grams in
- Grind: setting number
- Time: seconds to yield
- Yield: grams out
- Taste: sour, bitter, balanced
- Puck: even, cratered, wet patch
A Specialty Coffee Association resource on brewing standards is a useful reference for what a balanced shot should taste like. If you are building out your station, our list of essential tools for a professional home coffee bar covers what actually earns its counter space.
Stocking Your Home Bar with Fairwood Coffee
Great technique needs good coffee behind it. Once your puck prep is repeatable, the bean becomes the next variable worth controlling. At Fairwood Coffee, we deliver artisan blends straight to your door with fast, automated fulfillment, so your bar stays stocked without you managing inventory.
Our 6 Bean Blend is a dark roast house blend built for espresso. If you want a sweeter espresso, the Blonde blend from Central America and Africa is worth a try. Prefer decaf? The Decaf Espresso uses a water process and roasts dark for espresso.

Our blends are priced at $24.99 and delivered automatically.
Channeling is a puzzle with a short list of suspects, and the fix is almost always in your routine, not your wallet. Start with an even bed, a level tamp, and a consistent grind, then log every shot until the results stop surprising you. Fairwood Coffee can keep your bar stocked with espresso-ready blends and automated delivery, so you can focus on the puck instead of the pantry. Get started with Fairwood Coffee and dial in a shot that tastes the same every morning.
Frequently Asked Questions
How to stop espresso from channeling?
Start with a repeatable puck-prep workflow: weigh your dose, break up clumps with a WDT tool, level the bed, and tamp straight. Adjust grind size only after these steps are consistent. A bottomless portafilter helps you spot uneven flow. If channeling persists, log each shot's time, yield, and taste to isolate whether the issue is puck prep, grind, or the machine.
Can grind size cause espresso channeling?
Yes. If the grind is too coarse or inconsistent, water finds paths of least resistance and channels form. Too fine can also cause uneven saturation and channeling. Adjust in small steps. Note that changing grind size alone may not fix channeling if your distribution or tamp is uneven, so dial in puck prep first.
How can you tell if an espresso shot is channeling?
Look for spraying or spurting from the bottomless portafilter, blond streaks in the flow, or an uneven extraction where one area darkens faster. Taste clues include sudden bitterness or sourness and a thin body. Shot time may be shorter than expected. These signs mean water is bypassing parts of the puck, so review your distribution and tamp.
What is the 30-second rule for espresso?
The 30-second rule is a rough guideline that a standard espresso shot should take about 25-30 seconds to extract. It is not a hard rule; dose, grind, and brew ratio affect timing. Use it as a baseline: if shots consistently run much faster or slower while tasting off, adjust grind or puck prep. Always judge by taste and yield, not time alone.
