

Manual Coffee Grinders for Beginners: A Practical Guide
Table of Contents
- Why Manual Coffee Grinders Matter for Beginners
- Manual Coffee Grinder Buying Guide: What to Look For
- Hand Grinder Grind Settings by Brew Method
- Manual Grinder for French Press: Setup and Technique
- Manual Grinder for AeroPress: Consistency and Control
- Common Mistakes Beginners Make with Manual Grinders
- Grinding Effort, Speed, and Realistic Expectations
- Frequently Asked Questions
Last Updated: October 13, 2026
Why Manual Coffee Grinders Matter for Beginners
Starting with manual coffee grinders beginners choose is smart: you get freshly ground coffee without the complexity or expense of electric equipment, and you notice the flavor difference immediately.
Grind quality matters more than the beans: a mediocre bean ground properly beats premium beans ground poorly, and manual grinders force the slow, attentive approach that produces better coffee.
Manual Coffee Grinder Buying Guide: What to Look For
Choosing the right manual grinder comes down to three factors: grind consistency, grind-size adjustment, and lifestyle fit.
Burr Material and Grind Consistency
The burr crushes your beans, and there are two types. Conical burrs are more forgiving and suit beginners because they tolerate slight variations in technique; flat burrs produce more uniform particles but demand consistent pressure and speed.
Stainless steel burrs last longer than ceramic, though ceramic is cheaper to replace.
Adjustment Range and Grind Settings
A manual grinder should handle everything from espresso-fine to coarse French press. Look for at least 15 distinct settings: click systems give precise, repeatable settings, while micro-adjustment fine-tunes between clicks.
Start with clear click stops so you can return to the same setting; once comfortable, micro-adjustment helps dial in specific brew methods.
Bean Capacity and Portability
For daily grinding, a 30-50 gram hopper is typical, enough for one or two cups without constant refilling. If you travel or grind multiple times daily, a 50+ gram hopper reduces refills.
The catch cup should hold at least as much as your hopper, or grounds spill. For travel, look for under 400 grams and a small footprint.
| Factor | Why It Matters | What to Look For |
|---|---|---|
| Burr Type | Affects grind consistency | Conical for beginners, flat for precision |
| Adjustment Range | Determines brew method flexibility | 15+ settings minimum |
| Bean Capacity | Affects daily convenience | 30-50g for home use |
| Weight | Affects portability | Under 400g if traveling |
| Build Quality | Determines durability | Metal body, tight tolerances |
Hand Grinder Grind Settings by Brew Method
Most guides say espresso should feel like powdered sugar and French press like breadcrumbs, true, but not helpful on day one.
One caveat: grind settings are not universal.
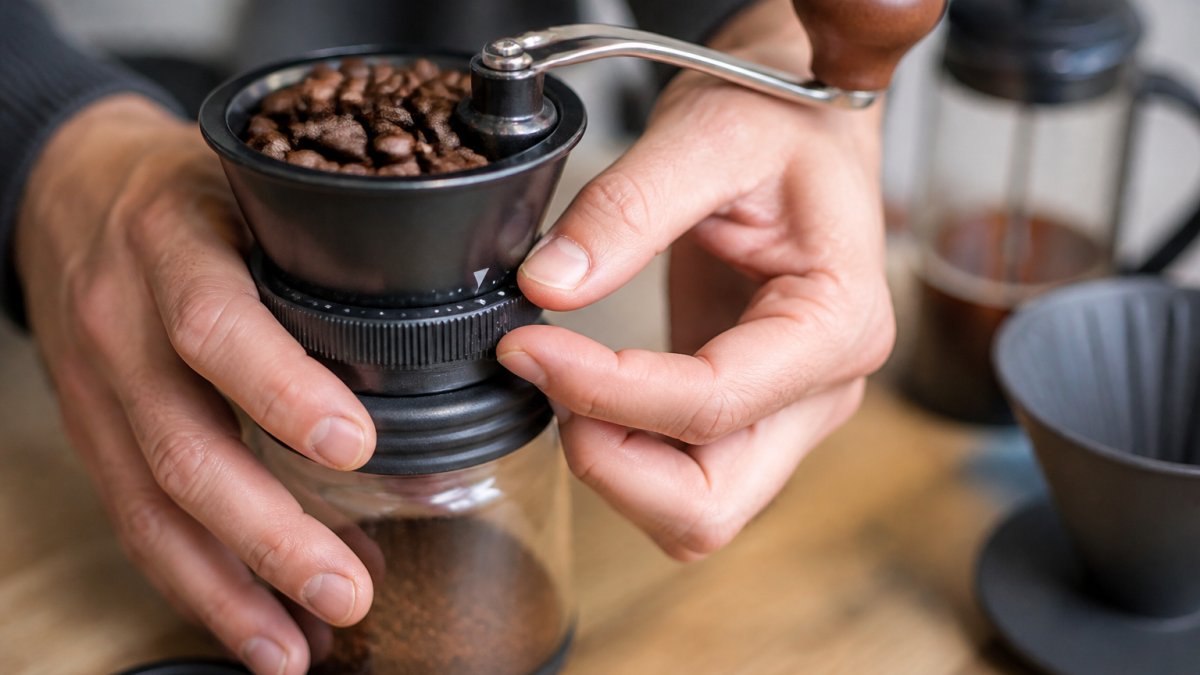
A Simple Starting Point by Brew Method
If your grinder has a numbered click dial from finest (1) to coarsest (say, 30), here is where most beginners should start:
| Brew Method | Starting Setting (of max) | Target Grind Feel | Typical Grind Time (15-20g) |
|---|---|---|---|
| Espresso | 1-3 clicks from finest | Powdered sugar, clumps when pinched | 3-5 minutes |
| AeroPress | 25-35% from finest | Fine table salt | 1.5-3 minutes |
| Moka Pot | 30-40% from finest | Fine sand | 2-3 minutes |
| Drip / Chemex | 50-60% from finest | Medium sea salt | 1-2 minutes |
| Pour-over (V60) | 55-65% from finest | Medium sea salt, slightly coarser than Chemex | 1-2 minutes |
| French Press | 75-85% from finest | Coarse breadcrumbs or peppercorns | Under 1 minute |
| Cold Brew | 85-100% from finest | Very coarse, like raw sugar | Under 1 minute |
These percentages work because most conical burr grinders distribute their usable range evenly. With fewer than 15 total settings, compress the ranges accordingly.
How to Adjust When the Cup Isn't Right
The starting point gets you close. The cup tells you the rest. Use this feedback loop:
- Too sour, weak, or thin? The grind is too coarse. Move 2-3 clicks finer and brew again.
- Too bitter, harsh, or dry? The grind is too fine. Move 2-3 clicks coarser.
- Muddy, gritty, or silty? The grind is too fine for that brewer's filter. Coarsen by 3-4 clicks.
Change one variable at a time, adjust grind size and water temperature together and you won't know which fixed the cup.
Why the Same Setting Tastes Different on Different Days
Beginners are often confused when a setting that worked last week tastes different now. Three things cause this:
- Bean age. Fresh beans (3-10 days off roast) grind differently than beans that are 4 weeks old. Older beans are drier and often need a slightly finer setting for the same extraction.
- Roast level. Dark roasts are more brittle and produce more fines at the same setting. Light roasts are denser and often need a finer grind.
- Bean origin and density. High-grown, dense beans (many African coffees) behave differently from lower-grown, softer beans (many Brazilian coffees).
This is why memorizing settings fails. Learn the adjustment logic, not the number.
Espresso and Fine Grinds
Espresso demands the finest grind your manual grinder can produce, powdered sugar with little texture.
Most manual grinders reach espresso-fine settings, but not all do it well.
Start at the finest setting and work backward if extraction is too slow. Espresso is unforgiving: slightly too coarse gives weak, sour shots; slightly too fine gives bitter, choked shots.
Medium Grinds for Drip and Chemex
Drip coffee and Chemex work best with medium grinds that feel like sea salt or fine sand, the sweet spot for most manual grinders, and quick to grind (1-2 minutes).
Medium grinds are forgiving, with more room for error than espresso. Weak cup? Grind finer. Bitter? Grind coarser. The feedback loop is fast.
Coarse Grinds for French Press and Cold Brew
French press and cold brew need coarse grinds that feel like breadcrumbs or peppercorns. They're quick to grind (under 1 minute) and produce a strong, full-bodied cup.
Coarse grinds are the most forgiving, a little finer or coarser barely changes the flavor, making them ideal for learning.
Manual Grinder for French Press: Setup and Technique
French press is the easiest brewing method for manual coffee grinders beginners use: grind, brew, press. No filters, no complicated timing.
Grind coarse, the largest setting your grinder offers.
A common mistake is grinding too fine.
Another mistake is pressing too hard. Gentle, steady pressure over 30 seconds is enough; aggressive pressing forces fine particles into your cup, making it gritty.
Manual Grinder for AeroPress: Consistency and Control
AeroPress sits between French press and espresso: forgiving, fast, and excellent. It's where manual grinders shine, because the AeroPress rewards consistency.
Use medium-fine grinds for AeroPress, roughly halfway between drip and espresso.
The AeroPress teaches grind consistency because results are immediate: uneven grounds over-extract (bitter) and under-extract (sour), tasting muddy.
If your grinder has a small catch cup, grind directly into the AeroPress chamber to save a step and keep grounds warm.
Common Mistakes Beginners Make with Manual Grinders
The biggest mistake is inconsistent grinding speed. Fast grinding produces uneven particles; slow, steady grinding (about 40-50 rotations per minute) produces more uniform ones.
Another mistake is grinding too fine for your brew method. Finer isn't better: finer grinds extract faster, causing over-extraction and bitterness.
Many beginners also don't adjust settings between brew methods.
Grinding Effort, Speed, and Realistic Expectations
Manual grinding takes time: a typical 15-20 gram dose takes 1-3 minutes depending on fineness, and espresso doses can take 5-10 minutes. That's part of the ritual, but before you buy you deserve a realistic picture of daily ownership.
The Real Learning Curve
The first week is the hardest. Here's what most beginners experience:
| Timeframe | Typical Grind Time (18g, medium) | What It Feels Like |
|---|---|---|
| Week 1 | 3-4 minutes | Awkward. Wrist tires. You stop to rest. |
| Week 2-4 | 2-3 minutes | Rhythm develops. Effort feels more even. |
| Month 2-3 | 1.5-2 minutes | Automatic. You grind while water heats. |
| Month 6+ | 1-1.5 minutes | Invisible part of the routine. |
Speed improves with practice, but the bigger change is that the effort stops feeling like effort. Your hand learns the motion, and the grinder becomes an extension of the ritual rather than an obstacle.
Physical Effort and Accessibility
Not all beginners have the same grip strength, wrist mobility, or stamina, and most reviews ignore it.
- Handle length and shape. A longer handle gives more leverage, reducing the force needed per rotation. A smooth, rounded knob is easier on the palm than a thin or angular one.
- Body grip. Grinders with a wider, textured body are easier to hold steady. Smooth cylindrical bodies require a tighter grip, which fatigues the hand faster.
- Burr sharpness. Sharp burrs cut beans; dull burrs crush them. A well-made grinder with sharp steel burrs requires noticeably less force than a cheap grinder with dull ones.
If you have limited hand strength, arthritis, or wrist issues, consider a longer handle, wider body, and stainless steel burrs. Test in person if you can: turn the handle 20 times with beans in the hopper.
Total Cost of Ownership: What Beginners Actually Spend
Purchase price is only part of the story. Here's what to budget over the first two years:
| Cost Category | Typical Range | Notes |
|---|---|---|
| Grinder purchase | $30-$200 | Beginner-friendly models cluster at $40-$100 |
| Replacement burrs | $0-$40 | Steel burrs often last 3-5 years; ceramic may need earlier replacement |
| Cleaning brush | $5-$10 | Often included; replace if lost |
| Airtight bean storage | $10-$25 | Extends freshness, reduces waste |
| Scale (0.1g accuracy) | $15-$30 | Essential for consistent dosing |
| Total 2-year cost | $60-$305 | Most beginners land near $100-$150 |
Durability is part of value: look for stainless steel burrs, metal internals, and tight burr-to-shaft tolerances, which reduce wobble and preserve consistency.
Manual vs. Electric: A Quick Decision Guide
Manual grinders win on price, portability, noise, and ritual; electric win on speed, volume, and physical ease. How to decide:
- Choose manual if: you brew 1-2 cups at a time, you want to spend under $100, you travel with your setup, you enjoy the ritual, or you want quiet morning grinding.
- Choose electric if: you brew for multiple people, you make espresso daily and want fast dialing, you have hand or wrist limitations, or you value convenience over cost.
Many beginners start manual and stay manual; others upgrade to electric once they know their brew method and volume. Neither path is wrong, the manual grinder you buy today teaches you what you want tomorrow.
The Effort Is the Point
The physical effort is a feature, not a bug: you slow down, pay attention, and that intentionality translates into better coffee and a more satisfying ritual. But it only works if the effort fits your body and routine, be honest about both before you buy.
Frequently Asked Questions
What makes a manual coffee grinder suitable for beginners?
A beginner-friendly manual coffee grinder balances ease of use with grind quality. Look for burr grinders with clear adjustment mechanisms, reasonable bean capacity (25-40 grams), and ergonomic handles that don't require excessive grinding effort. The grinder should produce particle uniformity across your target grind size, whether you're brewing espresso, pour-over, or French press. Entry-level models typically cost less than electric alternatives, making them a practical starting point for exploring freshly ground coffee.
Can you grind espresso beans with a manual grinder?
Yes, but with caveats. Manual grinders can produce espresso-fine grinds, but the grinding effort becomes substantial. Most beginners find hand grinders better suited for coarser grinds used in pour-over, French press, and AeroPress brewing. If espresso is your priority, a burr grinder with fine micron adjustment and low grinding resistance will make the process less exhausting. For occasional espresso, a manual grinder works; for daily espresso, an electric burr grinder may be more practical.
How do I know what grind size to use for different brew methods?
Start with these baselines: espresso requires the finest grind (powder-like), pour-over and Chemex need medium-fine consistency, AeroPress works with medium grinds, and French press demands coarse grounds. Adjust upward or downward based on brew time and extraction results. If your coffee tastes bitter, try a coarser grind; if it tastes weak or sour, grind finer. Most manual grinders have numbered settings or click adjustments that help you repeat your chosen grind size once you find what works for your brew method and bean type.
How long does it take to grind coffee with a manual grinder?
Grinding 30 grams of beans typically takes 3-5 minutes with a manual grinder, depending on the grind size and your grinding speed. Finer grinds take longer than coarse ones. For beginners, this grinding time becomes part of the ritual and allows you to control the process step by step. If you're brewing multiple cups or grinding daily, the time investment may feel significant, but many coffee enthusiasts view it as a worthwhile trade-off for grind consistency and the ability to grind immediately before brewing.