

How Can You Master Pour Over Coffee at Home?
Last Updated: October 25, 2026
Quick Summary
To master pour over coffee at home, use a 1:16 ratio (about 18 grams of coffee to 290 grams of water), a medium grind like table salt, and water just off the boil. Bloom with roughly 36 grams of water for 30 to 45 seconds, then pour in slow circles and finish with a total brew time of three to four minutes.
- Weigh beans whole before grinding, since weighing after grinding loses coffee to the grinder.
- Change one variable at a time and log each brew so you know what fixed the cup.
- A blade grinder chops unevenly, so a burr grinder is the single biggest equipment upgrade for pour over.
- Never let the pour stream hit the paper filter directly; water should pass through the coffee.
- Buy beans with a roast date, not just a best-before date, and use them within a few weeks.
Table of Contents
- What Makes Pour Over Coffee Different From Other Brewing Methods
- The Pour Over Coffee Ratio That Keeps Results Repeatable
- How to Pick the Right Pour Over Coffee Grind Size
- Finding the Best Burr Grinder for Pour Over Coffee
- Step-by-Step: Brewing a Clean Cup From Bloom to Finish
- Why Is Pour Over Coffee Bitter? Diagnosing and Fixing Extraction
- Choosing Beans and Water That Support the Method
- Ordering Beans That Suit Your Pour Over Setup
- Frequently Asked Questions
What Makes Pour Over Coffee Different From Other Brewing Methods
That control is the whole point. A drip machine decides everything for you. Pour over lets you adjust one variable at a time until the cup tastes right.
Fairwood Coffee has built this guide around that idea: pour over rewards attention, and it punishes guesswork. Most people who struggle with it are not using bad beans. They are skipping the small details that make the method repeatable.
Here is what separates pour over from the rest:
- Full control over extraction. You set the water temperature, pour rate, and contact time.
- A cleaner cup. Paper filters trap oils and fine particles that a metal mesh or French press lets through.
- Single-cup focus. Each brew is made to order, so freshness is built in.
The trade-off is honest: pour over makes one or two cups well, it is slower than pressing a button, and keeping a large batch hot is difficult. Need six cups at once for a meeting? This is not the method for you.
What You Need Before Your First Brew
You do not need much, or to spend a lot. A basic setup is five items:
- A dripper. A cone-shaped dripper sits on your mug or carafe and holds the filter.
- Paper filters. Buy the size that matches your dripper. A mismatched filter brews poorly.
- A gooseneck kettle. The narrow spout gives you a slow, steady pour. A wide-spout kettle splashes and pours unevenly.
- A digital scale. Weighing beans and water is the single biggest upgrade to consistency.
- A burr grinder. Freshly ground coffee beats pre-ground every time.
Optional: a timer, a notebook for logging brews, and a second mug for rinsing.
For a fuller list of gear, our manual coffee brewing equipment guide covers what each piece does and what you can skip at the start.
The Pour Over Coffee Ratio That Keeps Results Repeatable
The standard pour over coffee ratio is 1 gram of coffee to 15 to 17 grams of water. For a single mug, that means roughly 18 to 20 grams of coffee and 300 grams of water.
Why a ratio instead of scoops? A level scoop of one bean weighs differently than another. Grams do not lie.
Here is a simple starting table:
| Cup Size | Coffee (grams) | Water (grams) | Ratio |
|---|---|---|---|
| Small mug | 15 | 240 | 1:16 |
| Standard mug | 18 | 290 | 1:16 |
| Large mug | 22 | 350 | 1:16 |
| Two cups | 30 | 480 | 1:16 |
Weigh the beans whole, then grind, weighing after grinding loses coffee to the grinder, and those grams add up.
How to Scale the Recipe for More Than One Cup
Double the numbers, but not the brew time.
A common mistake is stacking two drippers and brewing both at once: your attention splits and one cup usually suffers. Brew one cup at a time; for a group, use a larger dripper and a carafe.
For a beginner-friendly walkthrough of ratios, this coffee brewing ratio guide for beginners gives you a concrete starting point you can adjust from.
How to Pick the Right Pour Over Coffee Grind Size
Pour over coffee grind size should sit in the medium range, close to the texture of table salt. Fine sand means too fine; coarse sea salt means too coarse.
Grind size controls how fast water moves through the bed of coffee. Finer grounds pack tighter, slow the flow, and expose more surface area, pulling more flavor out; coarser grounds speed the flow and pull less.
Reading Your Grinder and Making Controlled Adjustments
Most burr grinders adjust in clicks or numbered steps, one click at a medium setting changes the cup noticeably on a hand grinder, while electric steps may be finer.
Here is how to read the brew and adjust:
- Too fine: the brew stalls or drips slowly, the bed turns muddy, and the cup tastes harsh or bitter. The water is staying in contact too long and pulling out dry, woody compounds.
- Too coarse: water rushes through, the bed looks flat and drains in under two minutes, and the cup tastes weak or sour. The water is leaving before it can dissolve the sweeter compounds.
- Just right: the bed drains evenly in about three minutes, the surface stays level, and the cup tastes balanced with a clear finish.
A common pattern is to start at the grinder manufacturer's recommended medium setting, then adjust two clicks finer if the cup tastes sour and two clicks coarser if it tastes bitter. Make one change per brew and log the result. Two or three brews usually get you close.
Why Particle Consistency Matters More Than the Exact Setting
Two grinders set to the same "medium" can produce very different cups because consistency varies. A blade grinder chops unevenly, creating fine dust and coarse chunks in the same batch, so some grounds over-extract while others stay under-extracted and no single adjustment fixes the cup. A burr grinder crushes beans between two surfaces for a more even particle size, the single biggest equipment upgrade for pour over.
With a blade grinder, pulse in short bursts and shake between pulses to even out the grind, it will never match a burr grinder, but it reduces the worst unevenness. When buying a burr grinder, look for steel burrs and fine adjustment in the medium zone, not just espresso settings. Our guide to manual coffee grinders for beginners walks through the trade-offs.
A Repeatable Dialing-In Method for Grind Size
Use this controlled process to dial in any new bean or grinder:
- Set a baseline. Start at the manufacturer's medium setting, 18 grams of coffee, 290 grams of water, and water just off the boil.
- Brew and taste. Note whether the cup is sour, bitter, weak, or harsh.
- Change one variable. Adjust grind by one or two clicks in the direction that fixes the taste: finer for sour or weak, coarser for bitter or harsh.
- Repeat. Brew again with the same dose, water, and pour pattern. Log the setting and the taste.
- Stop when balanced. When the cup tastes sweet and clear with no sharp edges, you have found the grind for that bean.
This method works because it isolates grind size as the variable. Once you have a baseline grind for your setup, adjust it slightly for different beans: lighter roasts often need a touch finer, darker roasts a touch coarser. For a deeper look, our article on ways to improve coffee extraction at home covers the full set of causes.
Finding the Best Burr Grinder for Pour Over Coffee
The best burr grinder for pour over coffee is one with flat or conical burrs and many medium settings.
You do not need a commercial grinder for a good cup. A hand grinder with steel burrs handles pour over well and costs far less than an electric model.
What to check before buying:
- Burr type. Steel burrs last longer and cut more cleanly than ceramic.
- Adjustment range. You want fine control in the medium zone, not just espresso settings.
- Consistency. Ask how even the grind is at medium settings, not just at the extremes.
Our guide to manual coffee grinders for beginners walks through the trade-offs if you are choosing your first one.
Step-by-Step: Brewing a Clean Cup From Bloom to Finish
A clean cup comes from a steady, repeatable process. Follow these steps in order and change only one variable per brew.
Total time: about 4 minutes. Difficulty: beginner.
- Heat your water to just off the boil. Let it sit for 30 seconds after boiling.
- Weigh and grind. Use 18 grams of coffee at a medium grind.
- Rinse the filter. Pour hot water through the paper filter, then discard the rinse water. This removes paper taste and warms the dripper.
- Add the grounds and level the bed. Give the dripper a gentle shake so the bed sits flat.
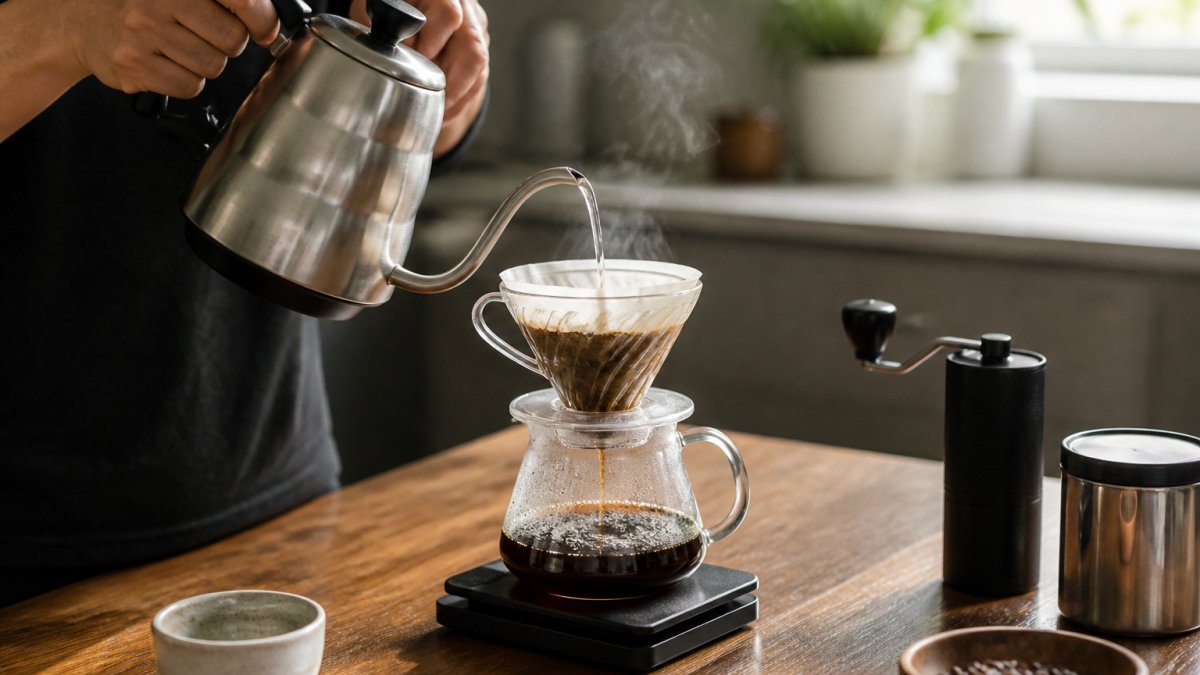
- Bloom. Pour about twice the weight of the coffee in water, around 36 grams. Wait 30 to 45 seconds. The bed will bubble as gas escapes.
- Pour in pulses. Add water in slow circles, keeping the bed covered. Pause between pours.
- Finish and let it drain. Stop when you hit your target water weight. The bed should drain flat.
Pouring Technique and Brew Time
Pour in slow circles from the center outward, and never let the stream hit the paper filter directly. Water should pass through the coffee, not run down the sides.
Total brew time should land between three and four minutes from the first pour. Faster usually means too coarse a grind; slower means too fine. Keep the water level steady and the bed flat, and the timing takes care of itself.
Why Is Pour Over Coffee Bitter? Diagnosing and Fixing Extraction
Pour over coffee turns bitter when it is over-extracted, meaning water stays in contact with the grounds too long or pulls too much from them.
Bitterness is a signal, not a mystery. Read it and adjust:
| Taste | Likely Cause | Fix |
|---|---|---|
| Bitter, dry, harsh | Over-extraction | Coarser grind or shorter brew |
| Sour, thin, sharp | Under-extraction | Finer grind or longer brew |
| Weak and watery | Too coarse or too little coffee | Finer grind, more dose |
| Muddy and slow | Too fine | Coarser grind |
| Flat and dull | Stale beans or cool water | Fresher beans, hotter water |
Change one variable at a time and log the result. Two or three brews usually get you close.
For a deeper look at fixing extraction problems, our article on ways to improve coffee extraction at home covers the full set of causes.
Choosing Beans and Water That Support the Method
Water makes up most of your cup, so it matters as much as the coffee. If your tap water tastes off, your coffee will too.
Beans matter just as much. Freshly ground coffee loses aroma fast, so grind right before you brew.
Roast level changes what you taste:
- Light roasts show fruit and floral notes. They reward careful brewing.
- Medium roasts balance sweetness and body. They are the easiest place to start.
- Dark roasts bring cocoa and caramel. They extract faster, so use cooler water.
Store beans in an airtight container away from light and heat. Do not keep them in the fridge.
Ordering Beans That Suit Your Pour Over Setup
Match the bean to the method and you will taste the difference immediately.
At Fairwood Coffee, we ship artisan blends and single origin coffees straight to your door with automated fulfillment, so you always have fresh beans without managing a pantry. Our Single Origin Favorites Sample Pack lets you try six origins in small packs before committing to a full bag, the smartest way to learn what your pour over setup does best.
A few starting points from our range:
- Ethiopia Natural: a medium-light roast with milk chocolate, fruity, and caramel notes.
- Costa Rica: a medium roast with sweet apple, raisin, and honey.
- Brazil Santos: a medium roast with an elegant, smooth cup and cocoa notes.
Brew each one the same way at first. Then adjust your grind to suit the bean, not the other way around.


Mastering pour over takes a few focused brews, not months of practice. The variables are few: ratio, grind, water, and time.
Fairwood Coffee makes the bean side of that equation simple.
Frequently Asked Questions
What is the pour over method for making coffee?
Pour over coffee is a manual brewing method where hot water is poured slowly over freshly ground coffee sitting in a paper filter inside a dripper. Gravity pulls the water through the grounds and filter into a carafe or mug below. The slow, controlled pour is what separates it from automatic drip machines: you decide the water temperature, the pour pattern, and the brew time, which gives you direct control over how the final cup tastes. A typical brew uses a medium grind, water just off the boil, and a total brew time of two to four minutes.
What coffee-to-water ratio should I use for pour over coffee?
Start with a pour over coffee ratio of about 1:16, meaning one gram of coffee for every 16 grams of water. For a single mug, that is roughly 20 grams of coffee to 320 grams of water. If the cup tastes weak or watery, tighten the ratio toward 1:15; if it tastes heavy or harsh, loosen it toward 1:17. Weigh both the coffee and the water on a digital scale rather than using scoops, because scoop volume varies wildly with grind size and bean density, and a repeatable ratio is the foundation of a repeatable cup.
How fine should coffee be ground for pour over?
Use a medium grind for pour over coffee grind size, roughly the texture of coarse sand or table salt. If the brew drains too fast and tastes sour or thin, the grind is too coarse; if it stalls and tastes bitter or drying, it is too fine. Adjust in small increments and change only one variable at a time. A burr grinder produces more consistent particles than a blade grinder, which matters because uneven grounds extract at different rates and muddy the flavor.
Why is my pour over coffee bitter?
Bitterness in pour over coffee usually points to over-extraction: the grind is too fine, the water is too hot, the brew time runs long, or the pouring agitates the bed too much. Try coarsening the grind slightly, letting the water cool for 30 to 45 seconds after boiling, and keeping the pour gentle. Old or stale beans can also taste bitter, so check the roast date. Change one variable per brew so you can tell which adjustment fixed the cup.
